What makes a dessert truly irresistible? For me, it’s the combination of moist red velvet cake, creamy white chocolate, and a simple homemade process. Made with white chocolate drizzles and a surprise middle layer, these easy cake balls are a quick treat to whip up for any family gathering. Save this idea for your next special occasion.
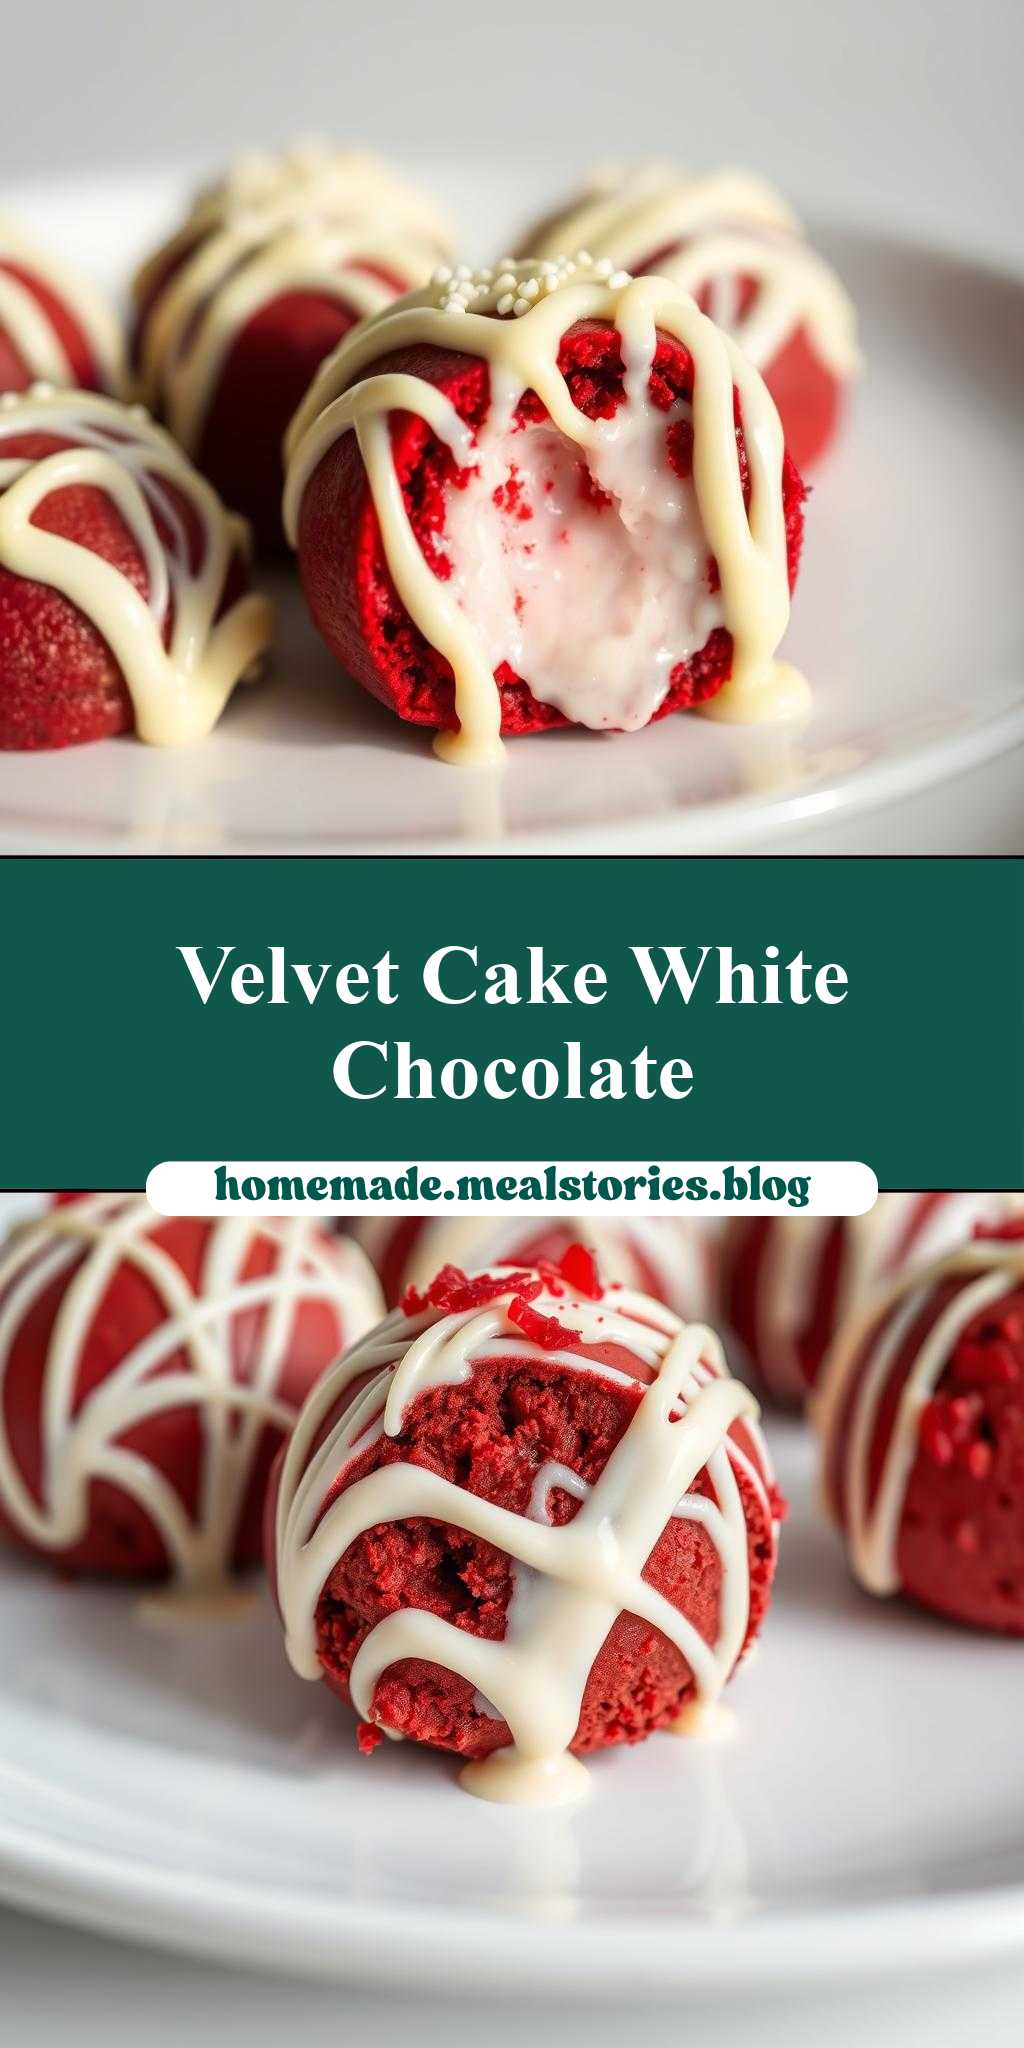
Red Velvet Cake Balls with White Chocolate Drizzles on Top and in the Middle
Introduction
Imagine indulging in the rich flavors of red velvet cake, combined with the creamy sweetness of white chocolate, all packed into bite-sized cake balls. This creative dessert is not only a feast for the eyes with its vibrant red color and golden drizzles, but it’s also surprisingly easy to make. Using everyday ingredients, you can create these stunning treats that are perfect for parties, gifts, or simply satisfying your sweet tooth. The best part? They require minimal effort for such an impressive result, making them a favorite among both beginner and experienced bakers.
Why This Works
- Flavor balance and ingredient accessibility: The combination of red velvet cake and white chocolate offers a unique and delicious flavor experience that’s hard to resist. Plus, the ingredients are easily found in most grocery stores.
- Ease of preparation: Despite their elegant appearance, these cake balls are relatively simple to prepare. The process involves baking a cake, crumbling it, mixing it with frosting, shaping into balls, and then coating with chocolate—a straightforward process that yields impressive results.
- Impressive results with minimal effort: What makes these red velvet cake balls truly special is how they can elevate any gathering or gift-giving occasion with their professional-looking finish, all achieved with minimal fuss and effort.
Key Ingredients
To make these delightful treats, you’ll need a few key ingredients. For the cake, you’ll require flour, sugar, unsalted butter, eggs, red food coloring, and buttermilk. For the frosting that helps bind the cake crumbs together, you’ll need cream cheese, butter, vanilla extract, and powdered sugar. Lastly, for the white chocolate drizzle, white chocolate chips are a must. Practical substitutions can be made, such as using vegetable oil instead of butter for a lighter cake or almond milk as a dairy-free alternative to buttermilk. The flexibility in ingredients makes this recipe accessible to a wide range of dietary preferences and restrictions.
Instructions
- Step 1: Begin by preheating your oven to 350°F (175°C). Prepare your cake pans and mix your cake ingredients according to your recipe, ensuring to incorporate the red food coloring evenly for that signature red hue. Bake the cakes until they’re fully cooked, then let them cool completely.
- Step 2: Once the cakes are cool, crumble them into a large mixing bowl. Prepare your cream cheese frosting by mixing the cream cheese, butter, vanilla extract, and powdered sugar until smooth. Add the frosting to the crumbled cake and mix until the cake is well coated and holds together when formed into balls.
- Step 3: Use a small cookie scoop or your hands to shape the cake mixture into balls, about 1 inch (2.5 cm) in diameter. Place the balls onto a baking sheet lined with parchment paper. Melt the white chocolate chips in a double boiler or in the microwave in 30-second increments, stirring between each interval until smooth. Insert a toothpick into each cake ball and dip into the melted white chocolate to coat, or use a spoon to drizzle the chocolate over the tops for a simpler approach.
- Step 4: For an extra touch, you can drizzle additional white chocolate over the cake balls after they’ve set. This not only adds an aesthetic appeal but also ensures that each bite has a mix of textures and flavors. Allow the chocolate to set at room temperature or speed up the process by placing the cake balls in the refrigerator for a few minutes.
Handy Tips
- To ensure your cake balls hold their shape, it’s crucial that the cake is completely cool before crumbling and mixing with the frosting. If the mixture is too dry, you can add a bit more frosting; if it’s too wet, add some more cake crumbs.
- For a variation, consider adding nuts, sprinkles, or shredded coconut to the cake mixture before shaping into balls for added texture and visual appeal.
- Avoid overmixing the cake batter or the frosting, as this can lead to dense cake balls. Similarly, don’t overheat the white chocolate, as it can seize up and become unusable.
Heat Control
When baking the cake, it’s essential to keep an eye on the temperature and timing. The ideal temperature is 350°F (175°C), and the cake is done when a toothpick inserted into the center comes out clean. Overbaking can lead to dry cake, which may not hold together well when mixed with the frosting.
Crunch Factor
The texture of these cake balls should be tender on the inside and slightly firm on the outside due to the white chocolate coating. To achieve this, ensure that the cake is not overbaked and that the chocolate is applied in a thin, even layer. For an added crunch, you can sprinkle chopped nuts or sprinkles on top of the wet chocolate before it sets.
Pro Kitchen Tricks
- Use high-quality white chocolate for the best flavor and texture. If melting chocolate in the microwave, be cautious not to overheat, as this can cause the chocolate to seize.
- Experiment with different types of cake and frosting for unique flavor combinations. For example, using lemon or orange extract in the frosting can add a bright and refreshing twist.
- For a shortcut, use store-bought cake and frosting. This can significantly reduce preparation time and still yield delicious results.
Storage Tips
- Store the cake balls in an airtight container at room temperature for up to 3 days. For longer storage, they can be refrigerated for up to a week or frozen for up to 2 months. When freezing, place the cake balls in a single layer in a freezer-safe bag or container to prevent them from sticking together.
- When reheating, simply leave the cake balls at room temperature for a few hours or gently warm them in the microwave for a few seconds.
- The best containers for storing cake balls are those that are airtight and can keep moisture out, such as glass containers with tight-fitting lids or plastic containers designed for baked goods.
Gift Packaging Ideas
These red velvet cake balls make perfect gifts due to their visually appealing nature and delicious taste. Consider packaging them in decorative jars, tin containers, or even paper cones wrapped with ribbon. For a more rustic look, use brown paper bags tied with twine and a gift tag. You can also add a personal touch by including a handwritten note or a small packet of coffee or tea to enjoy with the treats.
Flavor Variations
- Different spices: Adding a pinch of cinnamon, nutmeg, or cardamom to the cake or frosting can introduce warm, aromatic flavors.
- Creative toppings: Besides white chocolate, you can drizzle cake balls with caramel, melted milk chocolate, or even colored candy melts for various celebrations.
- Ingredient swaps: For a gluten-free version, use gluten-free flour. You can also substitute the cream cheese frosting with a dairy-free alternative for those with dietary restrictions.
Troubleshooting
- Texture problems: If the cake balls are too crumbly, add a bit more frosting. If they’re too wet, add more cake crumbs.
- Ingredient replacements: Always try to substitute ingredients with something similar in texture and flavor to maintain the integrity of the recipe.
- Over/undercooking signs: Keep an eye on the cake while it’s baking, and check it frequently towards the end of the baking time. A toothpick inserted into the center should come out clean for fully cooked cake.
FAQs
- Can I freeze it? Yes, you can freeze the cake balls for up to 2 months. Simply place them in a single layer in a freezer-safe bag or container.
- Is it gluten-free? Not in its traditional form, but you can make it gluten-free by substituting the flour with a gluten-free alternative.
- Can I double the recipe? Absolutely, just keep in mind that you’ll need to adjust the baking time slightly if you’re making a larger cake.
Conclusion
Making red velvet cake balls with white chocolate drizzles is a fun and rewarding baking project that’s perfect for any occasion. With their striking appearance and decadent flavor, they’re sure to be a hit. Don’t be afraid to experiment with different flavors and toppings to make the recipe your own, and enjoy the process of creating something truly special. Whether you’re a seasoned baker or just starting out, these cake balls are a great way to bring joy and sweetness into your life and the lives of those around you.
Red Velvet Cake Balls with White Chocolate Drizzles on Top and in the Middle
A recipe for bite-sized red velvet cake balls coated in white chocolate, perfect for parties, gifts, or satisfying your sweet tooth.
🥘 Ingredients
👩🍳 Instructions
-
1Preheat oven to 350°F (175°C). Prepare cake pans.
-
2Mix cake ingredients and bake until a toothpick inserted comes out clean.
-
3Crumble cooled cake and mix with cream cheese frosting until well combined.
-
4Shape into balls and coat with melted white chocolate.
-
5Allow chocolate to set, then serve or store in an airtight container.