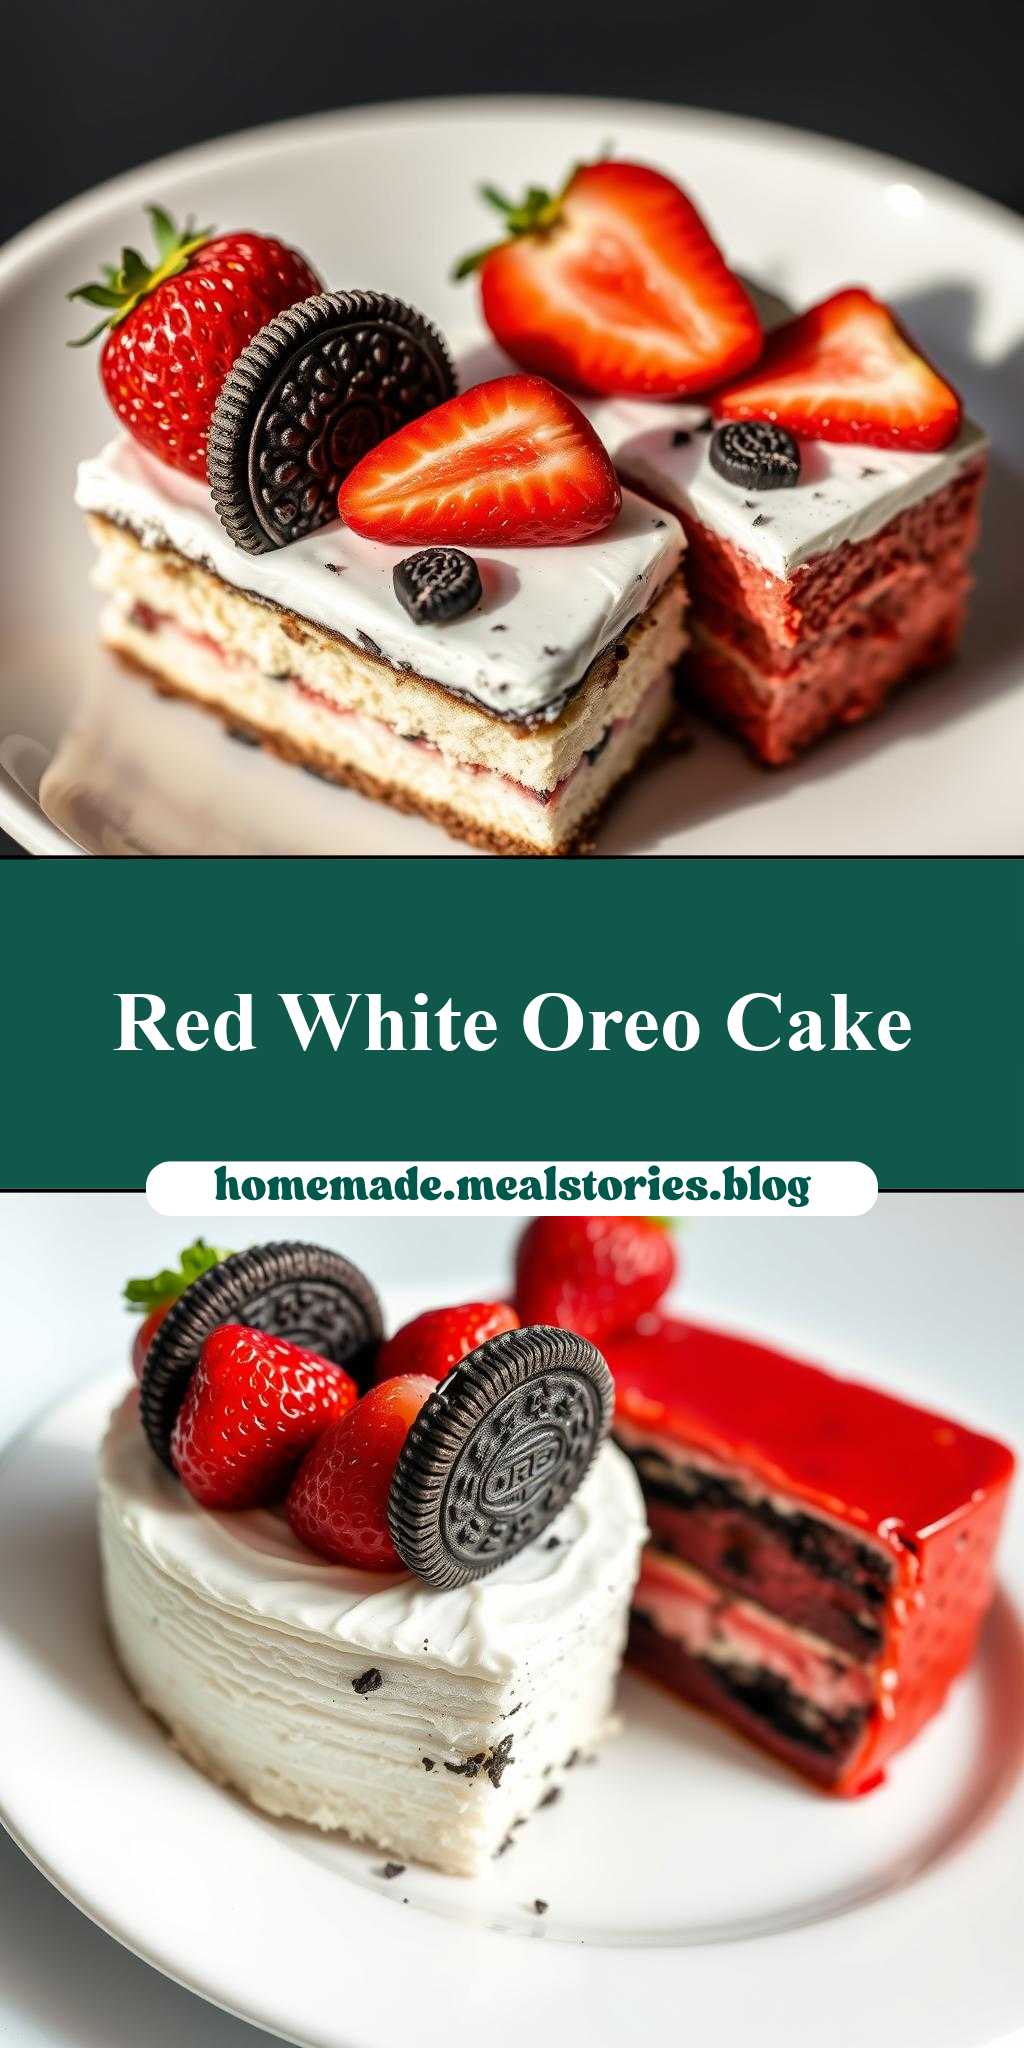
What’s the perfect pair for a sweet treat? Oreos and strawberries take center stage on these stunning homemade cakes, one in white and one in red, making for an easy and impressive dessert for any family gathering, try making them with simple quick recipes at home, save this idea
Two Cakes with Oreo Cookies and Strawberries on Top, One is White and the Other is Red
Introduction
Imagine a dessert that combines the simplicity of everyday ingredients with the elegance of a professionally crafted cake. This recipe for two cakes, one white and one red, both topped with Oreo cookies and fresh strawberries, is a masterpiece of flavor and presentation. It’s surprisingly easy to make, requiring minimal effort for a dessert that’s sure to impress. Whether you’re a novice baker or a seasoned pro, this recipe is perfect for special occasions or just a sweet treat any time of the year. The combination of moist cake, crunchy Oreo cookies, and the sweetness of strawberries will delight both kids and adults alike.
Why This Works
- Flavor balance and ingredient accessibility: The recipe balances sweet and savory flavors using common ingredients that are easily found in most grocery stores.
- Ease of preparation: Despite its impressive appearance, the cake is relatively simple to prepare, with straightforward steps that don’t require specialized baking skills.
- Impressive results with minimal effort: The contrast between the white and red cakes, topped with the distinctive black and white of Oreo cookies and the vibrant color of strawberries, creates a visually stunning dessert that belies its ease of preparation.
Key Ingredients
The main ingredients for this recipe include all-purpose flour, granulated sugar, eggs, butter or oil, milk, food coloring (red and white), vanilla extract, Oreo cookies, and fresh strawberries. For the cake, you can use either butter or oil, depending on your preference for flavor and texture. The food coloring is used to achieve the distinctive red and white colors of the cakes. Oreo cookies add a nice crunch and flavor contrast, while strawberries provide natural sweetness and freshness.
Instructions
- Step 1: Begin by preheating your oven to 350°F (180°C). Prepare two 8-inch round cake pans by greasing them and lining the bottoms with parchment paper. In a large mixing bowl, whisk together the flour, sugar, and a pinch of salt.
- Step 2: In another bowl, whisk together the eggs, milk, melted butter or oil, and vanilla extract. Add the wet ingredients to the dry ingredients and mix until just combined. Divide the batter evenly into two bowls. Add a few drops of red food coloring to one bowl and a few drops of white food coloring to the other, mixing well to achieve the desired colors.
- Step 3: Pour each colored batter into the prepared pans and smooth the tops. Bake for about 20-25 minutes, or until a toothpick inserted into the center of each cake comes out clean. Allow the cakes to cool in the pans for 5 minutes before transferring them to a wire rack to cool completely.
- Step 4: Once the cakes are cool, you can start decorating. Place one cake on a serving plate or cake stand. Arrange Oreo cookies on top of the cake, leaving a small border around the edges. Slice fresh strawberries and arrange them on top of the Oreos. Repeat the process with the second cake. You can use a small amount of whipped cream or frosting to secure the cookies and strawberries if needed.
Handy Tips
- To ensure the cakes are evenly colored, make sure to mix the batter well after adding the food coloring. For a more intense red color, you can use a bit more coloring, but be careful not to overdo it, as the color can quickly become too dark.
- If you find that your cakes are not baking evenly, check your oven temperature and consider rotating the pans halfway through the baking time.
- For an extra crispy Oreo topping, you can briefly bake the cookies in a low-temperature oven (200°F or 90°C) for about 5 minutes. Keep an eye on them to prevent burning.
Heat Control
Heat control is crucial when baking the cakes. The ideal temperature is 350°F (180°C), and the cakes should be baked for 20-25 minutes. To check for doneness, insert a toothpick into the center of each cake. If the toothpick comes out clean, the cakes are done. If not, bake for a few more minutes and check again. It’s also important to not overmix the batter, as this can result in dense cakes.
Crunch Factor
The crunch factor in this dessert comes from the Oreo cookies. To enhance the crunch, you can chill the cookies in the refrigerator for about 30 minutes before using them. This will help them retain their texture when placed on top of the cakes. Additionally, using fresh strawberries will provide a nice contrast in texture to the soft cake and crunchy cookies.
Pro Kitchen Tricks
- To make the cakes more moist, you can add an extra tablespoon or two of milk or use buttermilk instead of regular milk.
- For a professional finish, use a turntable to display your cakes, and consider adding a few fresh strawberry slices around the base of the cakes for extra visual appeal.
- If you’re not serving the cakes immediately, you can prepare them ahead of time and store them in an airtight container in the refrigerator for up to a day. Allow the cakes to come to room temperature before serving.
Storage Tips
- Leftover cakes can be stored in an airtight container at room temperature for up to 3 days. If you live in a warm or humid climate, it’s best to store them in the refrigerator to prevent spoilage.
- To freeze the cakes, place them in a freezer-safe bag or wrap them tightly in plastic wrap and then in aluminum foil. Frozen cakes can be stored for up to 2 months. When you’re ready to serve, thaw the cakes overnight in the refrigerator or at room temperature for a few hours.
- For reheating, you can warm the cakes in the microwave for a few seconds or in a low-temperature oven (200°F or 90°C) for about 5-10 minutes. Be careful not to overheat, as this can dry out the cakes.
Gift Packaging Ideas
If you’re considering gifting these cakes, there are several creative ways to package them. You can place each cake in a decorative cake box or a sturdy cardboard box lined with parchment paper. Wrap the box with colorful ribbon or twine and add a gift tag with a personal message. Another idea is to use glass or plastic containers with lids, which can be decorated with stickers, stamps, or paint. Don’t forget to include a few extra Oreo cookies and fresh strawberries on the side for an extra-special touch.
Flavor Variations
- Different spices: Consider adding a pinch of cinnamon, nutmeg, or cardamom to the cake batter for a unique flavor twist.
- Creative toppings: Instead of Oreo cookies, you could use other types of cookies, such as chocolate chip or peanut butter cookies, or even candy pieces like M&M’s or chopped peanut butter cups.
- Ingredient swaps: For a gluten-free version, you can substitute the all-purpose flour with a gluten-free flour blend. For a vegan version, use plant-based milk and replace the eggs with a flax or chia egg.
Troubleshooting
- Texture problems: If your cakes turn out too dense, it might be because the batter was overmixed. Try mixing the wet and dry ingredients separately and gently folding them together.
- Ingredient replacements: If you don’t have buttermilk, you can make a substitute by mixing 1 cup of milk with 1 tablespoon of white vinegar or lemon juice. Let it sit for 5-10 minutes before using.
- Over/undercooking signs: Keep an eye on the cakes while they’re baking. If they’re undercooked, they will be soft and squishy to the touch. If they’re overcooked, they will be dry and hard. Adjust the baking time as needed.
FAQs
- Can I freeze it? Yes, you can freeze the cakes for up to 2 months. Wrap them tightly in plastic wrap and then in aluminum foil or place them in a freezer-safe bag.
- Is it gluten-free? The original recipe uses all-purpose flour, which contains gluten. However, you can make a gluten-free version by substituting the flour with a gluten-free flour blend.
- Can I double the recipe? Yes, you can easily double the recipe to make more cakes. Just keep in mind that you’ll need to adjust the baking time slightly, as larger cakes take longer to cook through.
Conclusion
This recipe for two cakes with Oreo cookies and strawberries on top, one white and one red, is a versatile and delicious dessert option that’s perfect for any occasion. With its straightforward instructions and accessible ingredients, it’s a great choice for bakers of all skill levels. Feel free to experiment with different flavors and toppings to make the recipe your own, and don’t hesitate to reach out if you have any questions or need further clarification on any of the steps. Happy baking, and enjoy sharing your creations with friends and family!
Two Cakes with Oreo Cookies and Strawberries on Top, One is White and the Other is Red
A dessert recipe featuring two cakes, one white and one red, topped with Oreo cookies and fresh strawberries, perfect for special occasions or everyday treats.
🥘 Ingredients
👩🍳 Instructions
-
1Preheat oven to 350°F (180°C). Prepare two 8-inch round cake pans.
-
2Mix dry ingredients in one bowl and wet ingredients in another. Combine and divide into two bowls for coloring.
-
3Add a few drops of red food coloring to one bowl and a few drops of white food coloring to the other. Mix well.
-
4Pour each colored batter into the prepared pans and smooth the tops. Bake for 20-25 minutes or until a toothpick comes out clean.
-
5Allow the cakes to cool. Decorate with Oreo cookies and fresh strawberries.
-
6Serve and enjoy!