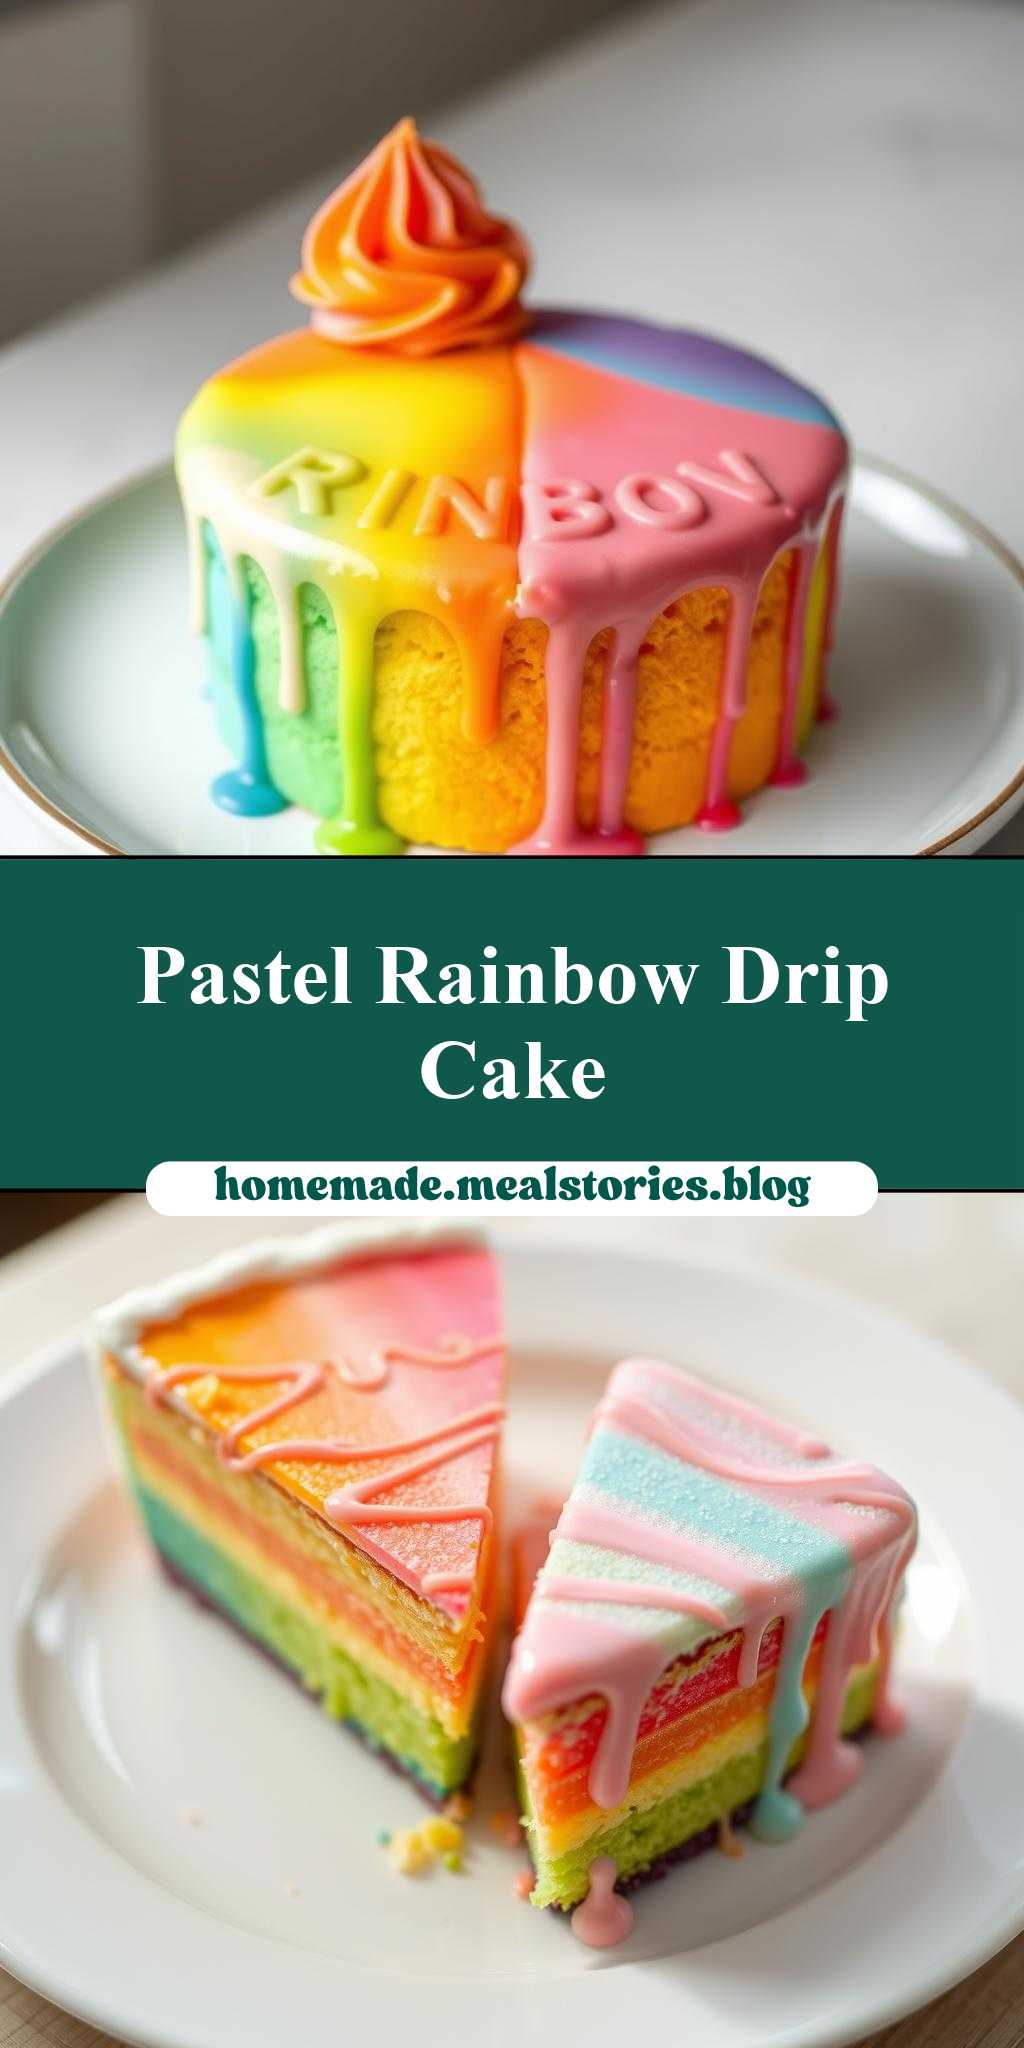
What makes a cake truly showstopping – is it the pastel rainbow colors or the ombre drip effect? This homemade masterpiece features two different types of rainbow ombre drip cake, made with simple ingredients like butter and sugar, perfect for a quick and easy family favorite dessert. Save this idea for your next celebration and get ready to impress your guests with a beautiful pastel rainbow on top, try it soon.
two different types of rainbow ombre drip cake with the words pastel rainbow on top
Introduction
Imagine a cake that is not only a treat to the taste buds but also a feast for the eyes. The rainbow ombre drip cake with pastel rainbow on top is a masterpiece of culinary art that combines the elegance of a drip cake with the whimsy of pastel colors. This cake is perfect for birthdays, weddings, or any celebration where you want to make a statement. The best part? It’s easier to make than you think, using everyday ingredients and requiring minimal special equipment. In this article, we’ll guide you through the process of creating two different types of rainbow ombre drip cakes with pastel rainbow on top, each with its unique flavor and character.
Why This Works
- Flavor balance and ingredient accessibility: The combination of vanilla, butter, and sugar provides a classic flavor profile that is both familiar and comforting. The use of food coloring to create the ombre effect makes it easy to customize the cake to your desired colors.
- Ease of preparation: The cake recipe is straightforward, and the ombre effect is achieved by simply layering the colored batter in the cake pan. The drip icing is also easy to make and requires only a few ingredients.
- Impressive results with minimal effort: Despite its impressive appearance, the rainbow ombre drip cake is relatively easy to make, requiring only basic baking skills and a bit of patience to achieve the perfect ombre effect.
Key Ingredients
The key ingredients for the rainbow ombre drip cake are: all-purpose flour, granulated sugar, unsalted butter, eggs, vanilla extract, and food coloring. For the drip icing, you’ll need powdered sugar, milk, and unsalted butter. You can also customize the cake with your favorite flavors, such as adding a teaspoon of salt or a handful of sprinkles to the batter. Practical substitutions include using whole wheat flour instead of all-purpose flour or replacing the granulated sugar with honey or maple syrup.
Instructions
- Step 1: Preheat your oven to 350°F (180°C) and prepare your cake pans by greasing them with butter and flouring them. In a medium bowl, whisk together the flour, sugar, and salt.
- Step 2: In a large bowl, using an electric mixer, beat the butter until it’s creamy, then add the eggs one at a time, beating well after each addition. Beat in the vanilla extract.
- Step 3: Gradually add the dry ingredients to the wet ingredients, alternating with the milk, beginning and ending with the dry ingredients. Beat just until combined.
- Step 4: Divide the batter evenly among 6 bowls. Add a few drops of food coloring to each bowl, starting with a small amount and adding more as needed to achieve the desired pastel colors. Layer the colored batter in the prepared pans, creating an ombre effect.
- Step 5: Bake the cakes for 20-25 minutes or until a toothpick inserted in the center comes out clean. Allow the cakes to cool in the pans for 5 minutes, then transfer them to a wire rack to cool completely.
- Step 6: To make the drip icing, combine the powdered sugar, milk, and unsalted butter in a small bowl. Beat until smooth and creamy, adding more milk as needed to achieve the desired consistency.
- Step 7: Once the cakes are completely cool, place one cake layer on a serving plate or cake stand. Drizzle the drip icing over the top of the cake, allowing it to set before serving.
Handy Tips
- To ensure that your cakes are evenly baked, rotate the pans halfway through the baking time.
- To achieve a smooth and creamy drip icing, make sure to sift the powdered sugar before using it.
- To customize the cake with your favorite flavors, try adding a teaspoon of salt or a handful of sprinkles to the batter.
Heat Control
The ideal temperature for baking the cakes is 350°F (180°C). To ensure that your cakes are evenly baked, rotate the pans halfway through the baking time. The cakes are done when a toothpick inserted in the center comes out clean. If you’re unsure, you can also check the cakes by pressing lightly on the top – if they feel firm and springy, they’re done.
Crunch Factor
The rainbow ombre drip cake should be tender and moist, with a delicate crumb. To achieve this, make sure to not overmix the batter, and don’t overbake the cakes. If you want to add a crunchy element to the cake, you can try sprinkling some chopped nuts or shredded coconut over the top of the cake before serving.
Pro Kitchen Tricks
- To ensure that your cakes are evenly sized, use a digital scale to measure the batter as you divide it among the pans.
- To achieve a smooth and creamy drip icing, make sure to sift the powdered sugar before using it.
- To customize the cake with your favorite flavors, try adding a teaspoon of salt or a handful of sprinkles to the batter.
Storage Tips
- The rainbow ombre drip cake can be stored at room temperature for up to 3 days, or frozen for up to 2 months.
- To freeze the cake, place it in a single layer in a freezer-safe bag or container, making sure to press out as much air as possible before sealing.
- To thaw the cake, simply leave it at room temperature for a few hours, or thaw it overnight in the refrigerator.
Gift Packaging Ideas
The rainbow ombre drip cake is a beautiful and unique gift that’s perfect for birthdays, weddings, or any celebration. To package the cake as a gift, try placing it in a decorative cake box or wrapping it in plastic wrap or aluminum foil. You can also add a personalized touch by writing a message on the cake or attaching a gift card.
Flavor Variations
- Different spices: Try adding a teaspoon of cinnamon or nutmeg to the batter for a warm and spicy flavor.
- Creative toppings: Sprinkle some chopped nuts or shredded coconut over the top of the cake for a crunchy and textured topping.
- Ingredient swaps: Replace the granulated sugar with honey or maple syrup for a unique and delicious flavor.
Troubleshooting
- Texture problems: If the cake is too dense or dry, try adding more milk or eggs to the batter. If the cake is too wet or soggy, try adding more flour or sugar.
- Ingredient replacements: If you don’t have unsalted butter, try using salted butter and omitting the salt from the recipe. If you don’t have whole milk, try using skim milk or a non-dairy milk alternative.
- Over/undercooking signs: If the cake is overcooked, it will be dry and crumbly. If the cake is undercooked, it will be wet and soggy. To avoid overcooking, check the cake frequently during the baking time, and remove it from the oven when it’s done.
FAQs
- Can I freeze it? Yes, the rainbow ombre drip cake can be frozen for up to 2 months. Simply place it in a single layer in a freezer-safe bag or container, making sure to press out as much air as possible before sealing.
- Is it gluten-free? No, the rainbow ombre drip cake contains gluten. However, you can try replacing the all-purpose flour with a gluten-free flour blend to make a gluten-free version.
- Can I double the recipe? Yes, you can double the recipe to make a larger cake. Simply multiply all the ingredients by two and bake the cakes in two 9-inch round pans.
Conclusion
The rainbow ombre drip cake with pastel rainbow on top is a unique and delicious dessert that’s perfect for any celebration. With its tender and moist texture, delicate crumb, and beautiful ombre effect, this cake is sure to impress your friends and family. Whether you’re a beginner or an experienced baker, this recipe is easy to follow and requires minimal special equipment. So why not give it a try and create your own masterpiece of culinary art? With a little practice and patience, you’ll be creating beautiful and delicious rainbow ombre drip cakes like a pro.