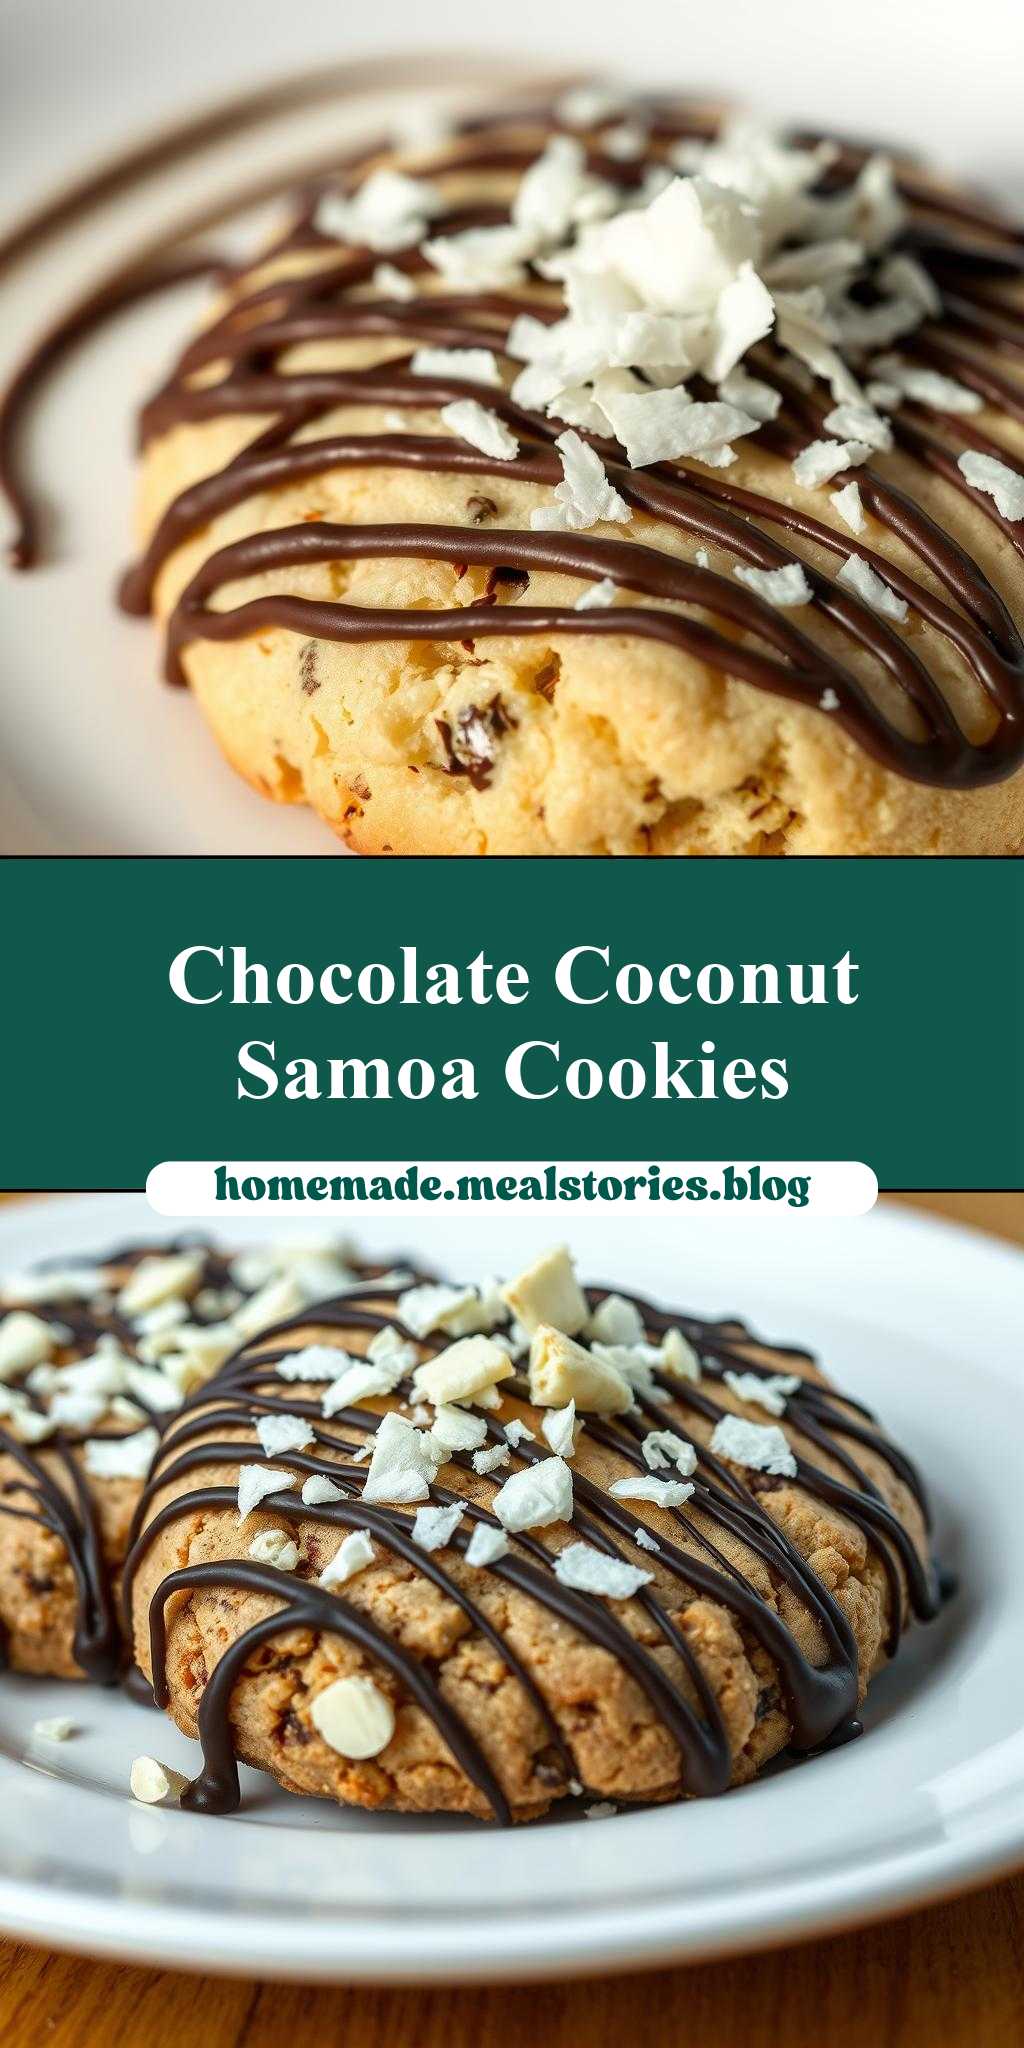
What makes the perfect Girl Scout cookie even better? Adding a rich chocolate drizzle and toasted coconut flakes to homemade Samoa cookies, made with tender caramel and crunchy shortbread, for an easy and indulgent treat, save this idea
homemade samoa girl scout cookies with chocolate drizzle and coconut flakes on top
Introduction
Indulge in the delightful taste of homemade Samoa Girl Scout cookies, elevated with a rich chocolate drizzle and toasted coconut flakes. These treats are not only a breeze to make but also offer an explosion of flavors and textures that will satisfy any sweet tooth. With everyday ingredients and a dash of creativity, you can recreate the magic of these beloved cookies in the comfort of your own kitchen. Whether you’re a seasoned baker or a beginner, this recipe promises to guide you through a fun and rewarding process, resulting in cookies that are as impressive as they are delicious.
Why This Works
- Flavor balance and ingredient accessibility: The combination of caramel, chocolate, and coconut, along with the use of readily available ingredients, makes this recipe a winner. Each component complements the others, creating a harmonious balance of flavors.
- Ease of preparation: Despite the multiple layers of flavor, these cookies are surprisingly easy to prepare. With straightforward steps and minimal special equipment, anyone can dive into making them.
- Impressive results with minimal effort: What’s most appealing about this recipe is how it transforms simple ingredients into a show-stopping dessert. The chocolate drizzle and coconut flakes add a luxurious touch, making these cookies perfect for sharing or gifting.
Key Ingredients
The foundation of these homemade Samoa Girl Scout cookies includes shortbread cookies, caramel filling, chocolate for drizzling, and toasted coconut flakes for the topping. For the shortbread, you’ll need butter, sugar, flour, and salt. The caramel is made with sweetened condensed milk, which can be substituted with a mixture of milk and sugar if needed. High-quality chocolate is essential for the drizzle, and shredded coconut is perfect for adding that tropical flavor and crunchy texture. Practical substitutions can be made for dietary restrictions, such as using gluten-free flour or dairy-free chocolate, ensuring everyone can enjoy these treats.
Instructions
- Step 1: Begin by preheating your oven to 300°F (150°C). Prepare your baking sheets with parchment paper. In a medium bowl, whisk together the flour and salt. Set aside. In a large bowl, use an electric mixer to cream together the butter and sugar until light and fluffy. Gradually add the flour mixture and mix until a dough forms. Roll out the dough to about 1/4 inch thickness and cut into desired shapes. Bake for 18-20 minutes, or until lightly golden. Allow the cookies to cool completely on the baking sheet.
- Step 2: To make the caramel, open a can of sweetened condensed milk and pour it into a 9×13 inch baking dish. Cover the dish with aluminum foil and place it in a larger baking dish. Add hot water to the larger dish to come halfway up the sides of the smaller dish. Bake for 45-50 minutes, or until the milk has thickened and turned a deep amber color. Remove from the oven and let cool. Once cooled, spread a small amount of caramel onto each cooled cookie.
- Step 3: Melt the chocolate in a double boiler or in the microwave in 30-second increments, stirring between each interval until smooth. Drizzle the melted chocolate over the caramel-covered cookies. Immediately sprinkle toasted coconut flakes over the chocolate before it hardens.
- Step 4: For the final touches, ensure the chocolate drizzle has set. This can be sped up by placing the cookies in the refrigerator for a few minutes. Once set, your homemade Samoa Girl Scout cookies are ready to be served or stored.
Handy Tips
- For a crisper shortbread, bake the cookies for an additional 2-3 minutes. Keep an eye on them to prevent overbrowning.
- When making the caramel, ensure the water level in the larger baking dish does not drop below halfway up the sides of the smaller dish, as this can affect the caramelization process.
- Experiment with different types of chocolate for the drizzle, such as dark, milk, or white chocolate, to change up the flavor profile.
Heat Control
Heat control is crucial, especially when making the caramel. The ideal temperature for baking the caramel is 425°F (220°C), but since we’re using a water bath method at 300°F (150°C), patience is key. The caramel is done when it reaches a deep amber color and has thickened significantly. For the chocolate drizzle, melting it in short increments in the microwave helps prevent burning, while a double boiler provides constant, low heat.
Crunch Factor
Achieving the right crunch factor in these cookies comes from the combination of the crunchy shortbread base, the gooey caramel, and the toasted coconut flakes. The shortbread should be lightly golden and firm to the touch, the caramel should be thick but still slightly chewy, and the coconut flakes should add a nice tropical crunch. To enhance the crunch, ensure the coconut flakes are toasted until lightly browned and fragrant.
Pro Kitchen Tricks
- For a professional finish, use a piping bag to drizzle the chocolate in a decorative pattern over the cookies.
- To toast coconut flakes evenly, spread them on a baking sheet and bake in a 350°F (175°C) oven for 5-7 minutes, stirring occasionally, until lightly browned.
- Consider using a silicone mat for baking the cookies, as it helps in even baking and makes the cookies easier to remove once cooled.
Storage Tips
- These cookies are best stored in an airtight container at room temperature for up to 5 days. If you plan to store them for a longer period, consider refrigerating them for up to 2 weeks or freezing for up to 2 months.
- When storing, place a sheet of parchment paper between layers of cookies to prevent them from sticking together.
- For reheating, simply leave the cookies at room temperature for a few hours or warm them in the microwave for a few seconds.
Gift Packaging Ideas
These homemade Samoa Girl Scout cookies make perfect gifts for friends, family, or coworkers. Consider packaging them in decorative jars or tins lined with parchment paper, or wrap them individually in cellophane bags and tie with a ribbon. For a more rustic look, place the cookies in a paper bag and seal with a sticker or a handwritten note. Whatever method you choose, these cookies are sure to bring a smile to the recipient’s face.
Flavor Variations
- Different spices: Add a pinch of sea salt or a teaspoon of vanilla extract to the caramel for an enhanced flavor.
- Creative toppings: Experiment with different types of nuts, such as almonds or pecans, or try using candy pieces like M&M’s or chopped peanut butter cups.
- Ingredient swaps: Use dairy-free milk or vegan chocolate to make these cookies more inclusive for those with dietary restrictions.
Troubleshooting
- Texture problems: If the caramel turns out too runny, it may not have been baked for a sufficient amount of time. If too thick, it might have been overbaked.
- Ingredient replacements: Always choose high-quality replacements to ensure the best flavor and texture. For example, using margarine instead of butter can affect the taste and texture of the shortbread.
- Over/undercooking signs: Keep an eye on the cookies while they’re baking, as overbaking can make them too hard. For the caramel, check regularly during the last 10 minutes of baking to prevent overcooking.
FAQs
- Can I freeze it? Yes, these cookies can be frozen for up to 2 months. It’s best to freeze them before adding the chocolate drizzle and coconut flakes.
- Is it gluten-free? Not in its current form, but you can make it gluten-free by substituting the all-purpose flour with gluten-free flour.
- Can I double the recipe? Absolutely, just ensure you have enough baking sheets and ingredients. Doubling the recipe does not change the baking time significantly but keep an eye on the cookies to prevent overbaking.
Conclusion
Making homemade Samoa Girl Scout cookies with chocolate drizzle and coconut flakes on top is a rewarding baking experience that combines classic flavors with creative touches. With these steps and tips, you’re well on your way to creating a dessert that’s both a crowd-pleaser and a personal favorite. Don’t hesitate to experiment with different flavors and toppings to make this recipe your own, and enjoy the process of sharing these delightful treats with others. Happy baking!